
How to Build a Wet Room: A Step-by-Step Guide
13th October 2026
Build a wetroom from start to finish.
To build a wet room you need to create a continuously waterproof floor and lower wall that falls towards a drain. The work follows eight stages: check the floor structure, set the drain position, fit a sloped former, install waterproof backer boards, seal every joint and penetration, tile, then grout and seal. The waterproofing layer is what makes it a wet room. Everything else is finish.
A wet room is one of the few bathroom projects where the quality of the work is completely hidden once it is finished. Nobody sees the tanking. They see the tiles. That is precisely why wet rooms fail so often, and why it is worth understanding what sits beneath the surface before the first board goes down.
This guide sets out how a wet room is built properly; in the order the work actually happens on site.
What is a wet room?
A wet room is a bathroom where the shower area is open to the room rather than enclosed by a tray, and the floor itself is graded to fall towards a drain. There is no step to climb over and no lip to seal around.
The defining characteristic is not the absence of a tray. It is that the waterproofing runs continuously across the floor, up the walls and across every junction between them, so that water reaching any part of the structure has nowhere to go except the drain. In a conventional bathroom, waterproofing is localised. In a wet room, it is a sealed tank.
Is your bathroom suitable for a wet room?
Most bathrooms can be converted, but four things determine how much work is involved.
Floor structure
Concrete floors are the simplest to work with because the drain and the fall can be formed within the screed. Timber joisted floors are entirely workable but need more care, since the drain body has to pass between joists and the deck has to be stiff enough that movement does not crack the tiling. If you are working upstairs, read our guide on building a wet room on a timber floor before you start.
Drainage route
The waste needs a run to the soil stack with enough fall to clear reliably. Establish where the drain can physically go before you plan anything else, because the drain position dictates the fall, and the fall dictates the layout.
Floor height
A wet room floor build up is usually thicker than the flooring it replaces. Check the height against door thresholds and any adjoining rooms early. Slim boards can recover a surprising amount of headroom where build up is tight.
Ventilation
A wet room puts far more moisture into the air than a standard shower enclosure. An adequately rated extractor is not optional. Without it, condensation will find the coldest surface in the room and cause problems the tanking cannot prevent.
What do you need to build a wet room?
- A sloped shower former or a preformed sloped tray to create the fall
- A wet room drain and trap suited to the floor construction
- Waterproof tile backer boards for the floor and the walls in the wet zone
- Jointing tape, sealing tape for internal corners, and pipe collars
- Adhesive or sealant compatible with the board system
- Mechanical fixings with washers, where the substrate requires them
- Tile adhesive and grout suitable for continuously wet conditions
- A flexible sealant for movement joints at wall and floor junctions
How to build a wet room step by step
Step one: strip back and inspect the substrate
Remove the existing floor covering and any old adhesive down to a sound substrate. Check for movement, rot, damp and level. A wet room is only ever as good as what it is built on, so any structural repair happens now rather than later.
Step two: set the drain position and the fall
Position the drain and cut the substrate to receive the drain body. A wet room floor needs a consistent fall to the outlet across the whole showering area. A sloped former does this work for you and removes the guesswork, which is why most installers now use one rather than forming falls in screed by hand.
Step three: fit the sloped former
Bed the former into adhesive across its full underside, not in dabs, or in the case of using Marmox MSP360 – use one full tube is used. Check that the former sits flush with the surrounding floor level and that the drain sits marginally below the finished tile surface so water is never left standing.
Step four: board the floor and walls
Install waterproof tile backer boards (ideally Marmox Multiboards) across the remainder of the floor and up the walls in the wet zone. Boards should be laid so that joints in the floor do not coincide with joints in the wall, and cut tight to the former. This is the layer that carries both the waterproofing and the weight of the tiling, so it needs to be fully supported and correctly fixed. It is recommended to run a bead of Marmox MSP360 sealant along all the edges of the boards before butting them together.
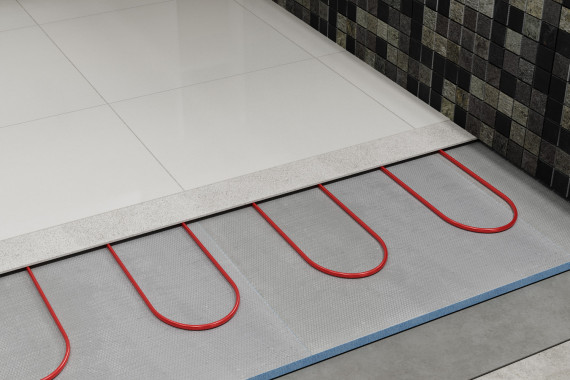
Boards that combine insulation with waterproofing serve a second purpose here, warming the floor surface and improving the response of any underfloor heating beneath the tiles.
_-_28de80_-_6e07749bb8cdc385258bf0bacaa7c755758bd0e3.jpg)
Step five: seal every joint, corner and penetration
This is the stage that determines whether the wet room works. Apply sealant or adhesive along every board joint and embed jointing tape into it. Use preformed sealing tape at internal corners and at the wall to floor junction, where movement is greatest. Fit pipe collars around every penetration, including the shower valve, the waste and any radiator tails.
Water does not pass through a board. It passes through the gaps between boards. Treat every joint as a potential leak until it is sealed.
Step six: check
Inspect the whole tanked area for missed joints, gaps in tape and pinholes in sealant. Better to check at this stage, as fixing it after tiling costs the room.
Step seven: tile the floor and walls
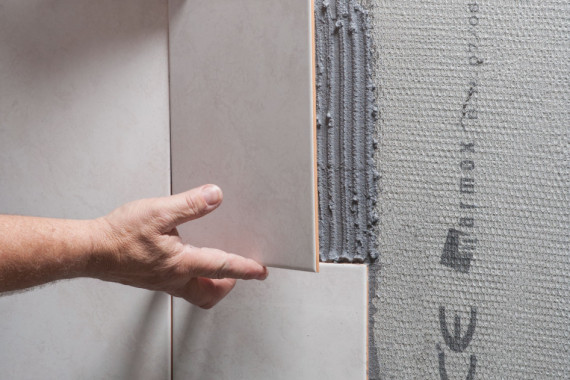
Tile onto the boards using an adhesive rated for wet conditions, working from the drain outwards so cuts fall at the perimeter. Smaller format tiles or mosaics follow the fall around the drain more comfortably than large format tiles, which is why so many wet room floors use them in the showering area. If using large tiles, ensure cut lines run from the corners of the former to the corners of the drain grate to encourage the falls.
Step eight: grout, seal and commission
Grout with a product suited to constant wetting. Replace grout with a flexible sealant at every internal corner and at the junction between wall and floor, because these are movement joints rather than tile joints. Fit the drain cover, commission the shower, and check that water runs cleanly to the outlet with no ponding.
What causes wet rooms to fail?
Almost every wet room failure traces back to one of five things.
- Untaped joints. The most common single cause. A board system is only waterproof once the joints between the boards are sealed.
- Insufficient fall. Water that sits on the floor will eventually find a weakness. A properly formed fall moves it away immediately.
- Movement in the substrate. A deck that flexes will crack tiles and grout, which lets water reach the tanking far more often than it should.
- Rigid grout at movement junctions. Corners move. Grout does not. The junction between wall and floor needs a flexible sealant.
- Grout treated as waterproofing. Grout is porous. It manages water at the surface. The tanking layer beneath is what actually keeps the structure dry.
How long does it take to build a wet room?
For a competent installer working on a straightforward bathroom, the tanking and boarding stages typically take two to three days, with tiling and finishing adding a further two to four days depending on the format of the tile and the size of the room. Curing times for adhesives and grouts must be observed between stages, so the realistic total for a full conversion is one to two weeks.
Structural repairs, drainage alterations and timber floor strengthening all add time. Building it quickly is rarely the same as building it once.
Frequently asked questions
Do you need to tank a wet room?
Yes. Tanking is what defines a wet room. Without a continuous waterproof layer beneath the tiles, water will reach the substrate through the grout and cause damage, regardless of how well the tiling is done.
Can you build a wet room without a former?
You can form falls in screed by hand, but it demands considerable skill to achieve a consistent gradient in every direction towards the drain. A sloped former achieves the same result predictably and is now standard practice on most installations.
Does a wet room need underfloor heating?
It is not required, but it is strongly recommended. Underfloor heating dries the floor between uses, which reduces standing water, limits mould growth and makes a tiled floor far more comfortable to stand on.
What fall does a wet room floor need?
The floor needs a continuous gradient towards the drain across the whole showering area, with no flat spots or reverse falls. A preformed sloped former provides this as manufactured, which removes the risk of getting it wrong on site.
Can you tile straight onto a wet room former?
Yes. Sloped formers are manufactured to receive tile adhesive directly, provided the joints between the former and the surrounding boards have been sealed and taped first.